
I know I’ve said this before (and I know I’ll say it again—about something different, no doubt)—but is there anything that says “fall” more than caramel apples????? (That’s what I always hear in my head when I hear the phrase caramel apples.)
Today, at least, the answer is NO!
So let’s make some. With the apples my family picked at the orchard, and with HOMEMADE CARAMEL.
(Side note: do you pronounce the word caramel as 3-syllables or 2? I'm usually a 2 girl, myself, though my older daughter is squarely a 3. According to dictionary.com, both ways are accepted.
We’re using Sally’s caramel recipe (of Sally’s Baking Addiction) because of course we are. Her recipes are amazing and you probably realize by now I’m a major fan of hers.
Homemade caramel apples also happen to be Sally’s October baking challenge over on her blog, so this post has a zillion tips and tricks for choosing apples and making the caramel (there’s even a how-to video!) and all of the good stuff. Plus, if you make the recipe and send her a pic, you are entered to win a prize. So by all means, get on it!
Homemade Caramel Apples
Caramel recipe by Sally’s Baking Addiction
Ingredients:
For the base apple with caramel--
8–9 cold apples
1 and 3/4 cups (420ml) heavy cream
1 cup (240ml) light corn syrup
2 cups (400g) packed light or dark brown sugar
1/4 cup (4 Tablespoons; 60g) unsalted butter, at room temperature
1/2 teaspoon salt
1/2 teaspoon pure vanilla extract

Plus toppings of your choice. I used:
¼ cup mini M&Ms
¼ cup mini Reese’s Pieces
1/3 cup sweetened coconut, toasted
1/3 cup mini chocolate chips
¼ cup pecans, toasted and chopped
Directions:
1. Prep apples. Make sure they’re washed and dried and cold (which helps the caramel set) before you dip them. Insert wooden sticks in them. I stored mine in the refrigerator while I made my caramel.

2. Prep toppings. You’ll need to have these ready to go before your caramel because once you dip the apple, you have to get those toppings on there quickly or they won’t stick. I toasted up some coconut on a pan over low heat on the stove. Be sure to keep it moving or it will burn! When it starts to get golden, take it on and off the heat as needed. Alternately, you can use the oven method from this delish post from last year. I also toasted up some chopped pecans. Same stovetop method. Keep stirring them so they don’t burn. They’ll get golden and toasty and they’ll smell nutty. That’s how you know they’re done.

3. Prep pan. Have a Silpat-lined pan nearby for when you dip your apples. Sally says the caramel doesn’t stick to Silpat as badly as it seems to stick to other surfaces.
4. Make caramel. Combine the heavy cream, corn syrup, brown sugar, butter, and salt in a 3-quart heavy-bottomed pot over medium heat. (Leave the temp at medium the whole time.)
Stir constantly with a wooden spoon until the butter is melted. You’ll notice it starts off white from the cream, but gets deeper and deeper brown in color as it cooks and the butter melts.


Once all the butter has melted, brush down the sides of the pan with a pastry brush moistened in water. (This cuts the risk of burned caramel on the sides of your pan.) Also, attach a candy thermometer to your pot. (Make sure the bottom of the thermometer is not against the bottom of the pot.)

Without stirring, let the mixture cook and bubble until it reaches 235°F (113°C). Sally said this takes about 15 – 20 minutes, but it took mine about 21 minutes. She also advises using the thermometer and not the time as your guide, because sometimes it takes longer to come up to temperature. Mine hung out at 224° for about 8 of the first 15 minutes. Then it took 5 more minutes to rise 5 more degrees. It finally came to temperature at 21 minutes. I've included some shots below so you can get a sense of how it looks as it comes to temperature.
Once at 235°F (143°C), remove caramel from heat and stir in the vanilla. Don’t stir too much or the caramel gets bubbles.


Allow caramel to cool for 10-15 minutes until slightly thickened. If caramel is too thin to coat apples, give it another 5-10 minutes.
 |
| Fresh off the heat |
 |
| You can see how it's thickened after 15 minutes |
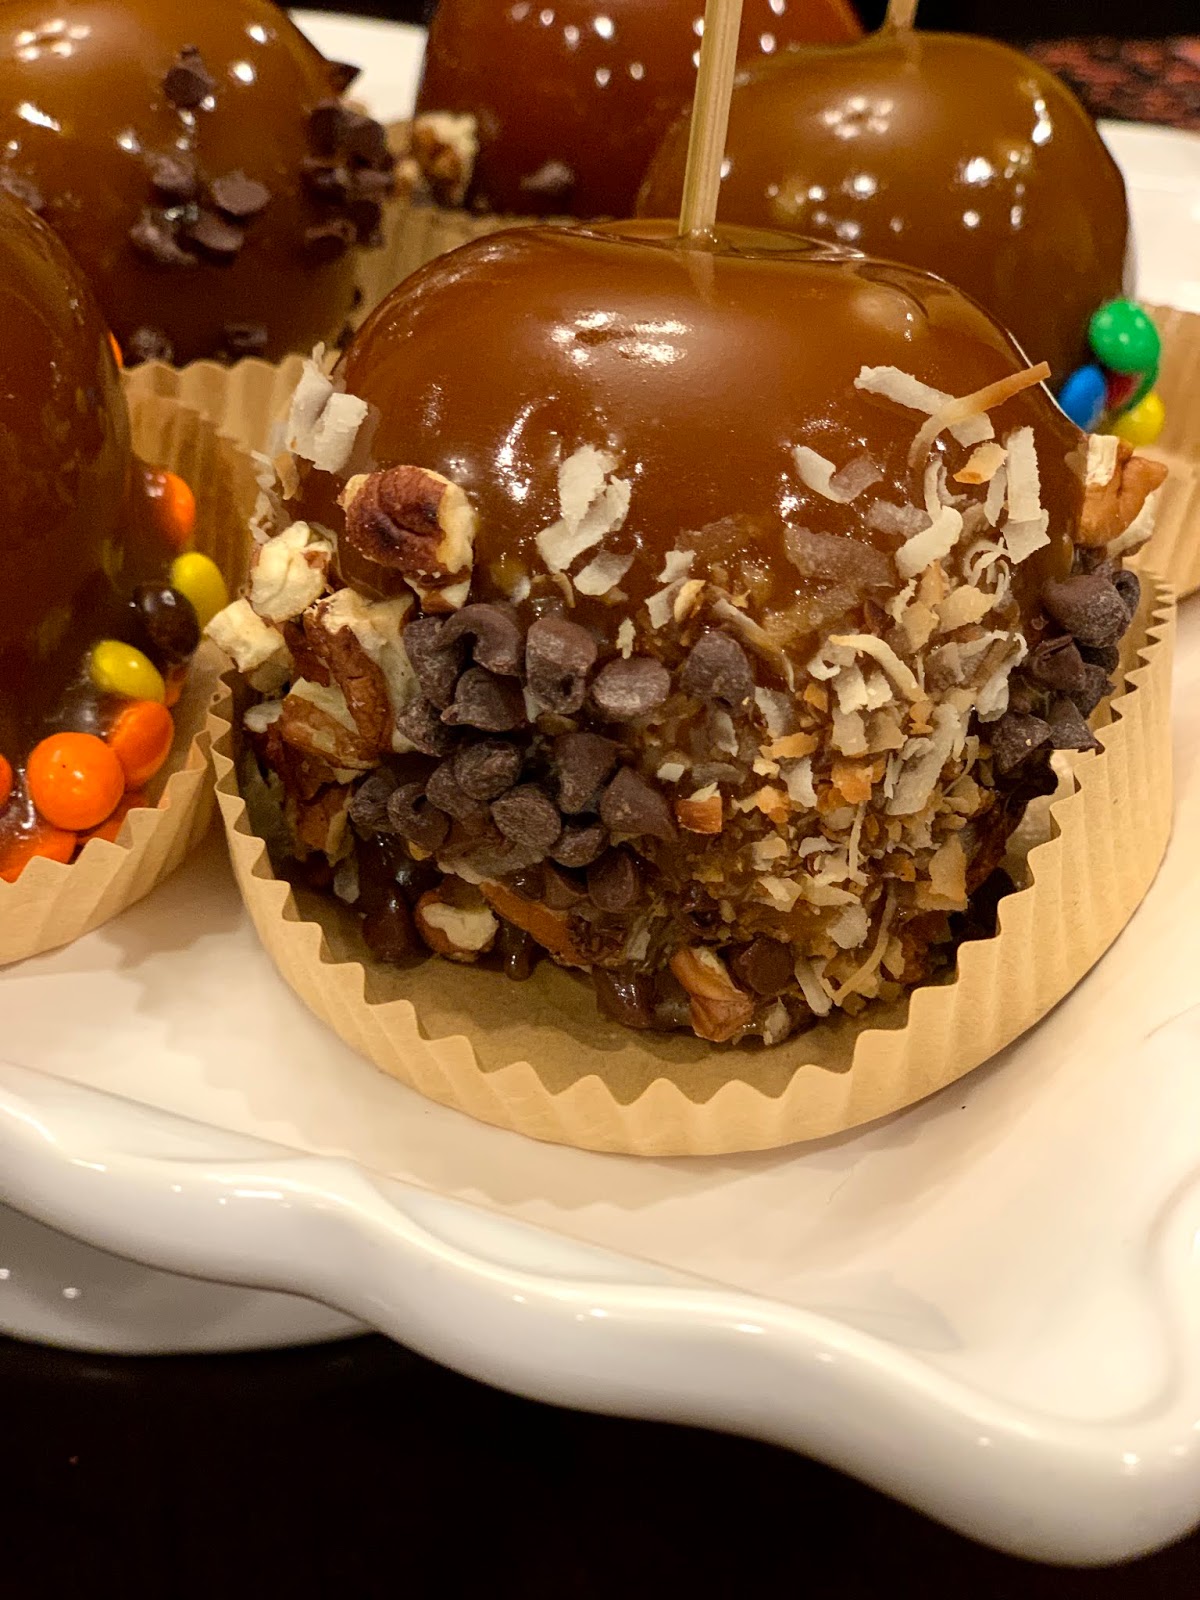
5. Dip apples. Holding stick of cold apple, dip into the pan of slightly cooled, slightly thickened caramel. Tilt the pot as needed. Fully coat the apple. Lift it out of the pot and twirl it gently so extra caramel drips back into the pan or settles around the apple. If you are adding toppings, now is the time. I had much better results dipping the apple into the topping than trying to sprinkle them on. Place coated apple on Silpat pan. Repeat apples one at a time.


Apples take about 45 minutes for the caramel to fully set, but you can eat them sooner if you can’t wait. Store remaining apples in the refrigerator on a nonstick surface (I found these large treat cups at Michaels crafts for about $3 and they’ve been working great) for up to a week.


Oh, one final note. I had lots of leftover caramel. I ended up dipping 2 more apples and also making caramel-filled chocolates with it. This caramel is rich and buttery and oh so gooooood.
No comments:
Post a Comment
Please feel free to comment. However, please note that not all comments will be posted, and that it does take time to read through them, so your comments may not be read the day you write them.
Thanks to all for your thoughts.