
I’ve always been a big fan of granola bars. When I was a kid, we rotated between the Sunbelt brand (which were chewier than other brands and had a very tasty variety with prominent coconut notes which I loved) and the Quaker brand. My favorite kind has always been the s’mores flavor. I was always sad they were the most underrepresented bar in the multi-packs; I’d try hoarding both of those for myself.
Several years ago when my kids were younger, I went through a stage of trying to make homemade versions of our favorite snack foods. Some never turned out quite right and were not worth the effort (homemade cheese its, for example), while others most definitely were. The homemade granola bars? The best of the bunch.
As the years have gone on, I’ve taken the wonderful base recipe for No-Bake Chocolate Chip Granola Bars I found years back on Lauren’s Latest, and with a few changes to mix-ins or the base cereal, adapted it into various other flavors including Fruity Granola, Strawberry Chocolate Chip, Peanut Butter Chocolate Chip, and, of COURSE, S’mores. Which, you will likely not be surprised to hear, are the most-requested variety in my house.
But I whip up 2 trays of these every 2 weeks or so. They come together in under 15 minutes and, after they cool and get wrapped individually in waxed paper, they’re the most delicious grab and go option in my house. My girls take them to school in lunches; we all grab them on the way out the door in the morning for breakfast if we’re running late; and they’re even a solid choice to munch on during that afternoon slump before dinner when the desire to forage is strong.
They’re REALLY good. You should definitely make these.
The only downside to making your own granola bars? The store-bought ones taste horrible in comparison. Seriously. I can’t even eat them anymore.
S’mores Granola Bars
(adapted from Lauren’s Latest No-Bake Chocolate Chip Granola Bars)
Yield: 16 bars
Ingredients:
¼ cup (1/2 stick) butter
¼ cup honey
1/3 cup packed brown sugar
2 cups quick cooking oats (not Old-Fashioned/Rolled oats)
1 cup crispy rice cereal (original OR chocolate)
½ teaspoon vanilla extract
(optional) ¼ teaspoon coconut extract
1/4 cup + 2 Tablespoons (*divided) mini-chocolate chips
1/4 cup + 2 Tablespoons (*divided) Kraft Marshmallow Bits (NOT the soft kind; the little baby ones that go in hot chocolate. See note below regarding where to find them.)
Directions:
1. In a large bowl, combine oats, cereal, and ¼ cup EACH mini-chocolate chips and Marshmallow Bits. Set aside.

2. In a small pot, melt butter, honey, and brown sugar together over medium-high heat, stirring occasionally.


3. Wait for it to start to bubble—you’re looking for large bubbles, like a full rolling boil—and then reduce the heat to medium-low. Cook for 2 minutes, stirring constantly.
 |
| This is when I grab my timer to set it. |
 |
| This is when I start the 2 minute clock. |
 |
| This is what it looks like when it's about done. |
4. Remove from heat, add vanilla, and stir. (It’ll make a hissing sound when you add the vanilla.)
5. Pour the wet ingredients over the dry ingredients and stir well so all the dry stuff is moistened.
Note: Because you’re adding hot liquid to chocolate chips and marshmallow bits, the chips and bits will melt as you stir. That’s normal and ok. Even if you can’t see them in the bars, you can taste them. And we’ll be adding extra that you CAN see to the tops.
 |
| You can still see the texture of the mixture as its going into the dry ingredients. |
 |
| Stir to coat. Work quickly because when the hot liquid hits the sides of the bowl, it cools quickly. |
 |
| Moistened granola with melty chips and bits. |
6. Pour into small jellyroll pan (mine is 10.5x7x1—aim for something in that ballpark) and press down with the back of a wooden spoon or rubber spatula so the granola mixture gets packed tightly in there. They’ll be about 1/2” thick. (Getting the mixture tightly packed is important for them setting up and staying together in a bar shape once cooled.)


(Note: The original recipe calls for the pan to be lightly greased, but I never grease mine and I’ve never had any trouble whatsoever getting my cut bars out of the pan. So that’s up to you.)
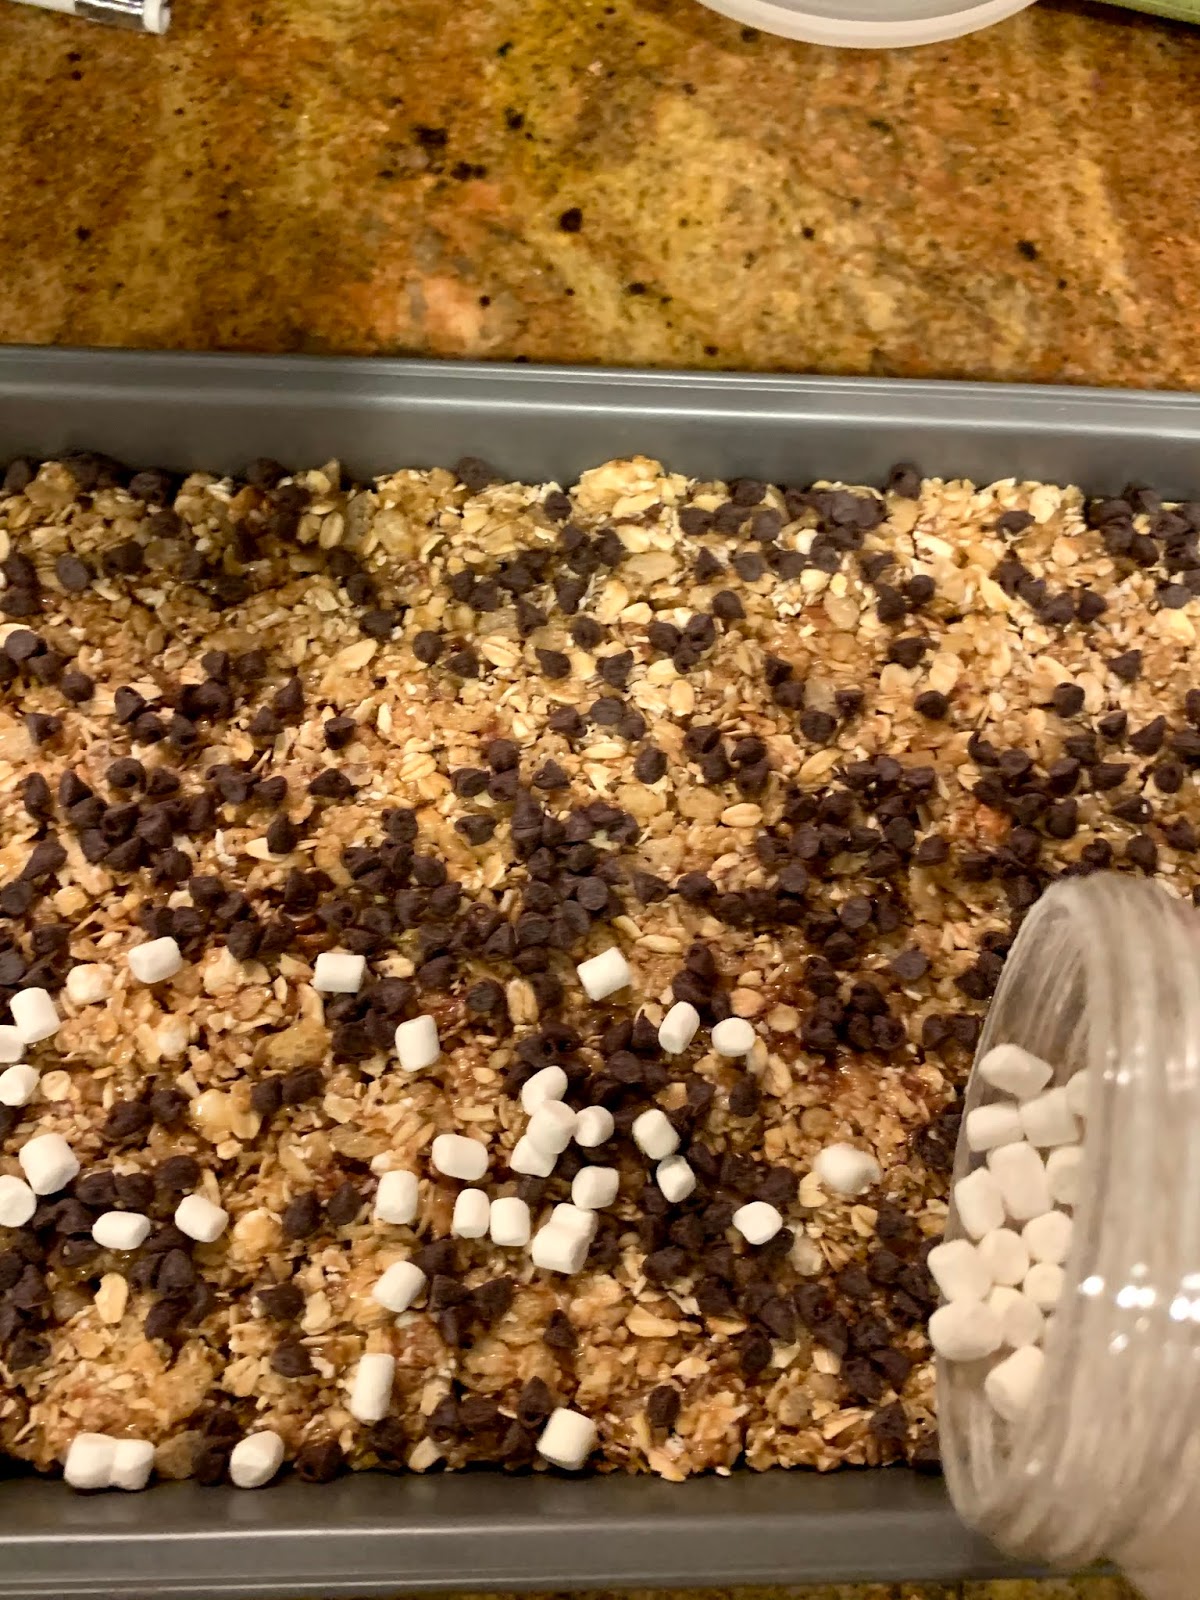
7. Sprinkle with 2 Tablespoons EACH mini-chocolate chips and Marshmallow Bits. Press down again, so they become part of the bars instead of just sitting on top where they’d roll off later.
8. Cool on counter to room temperature. You want those top chips set. Mine are usually ready to cut after 1-2 hours.

9. Cut into 16 bars. (I don't use a regular knife for this. I actually use a mayonnaise knife. It doesn't damage my pan and it's easy to handle. I also use my mayo knife to cut brownies.)
I turn my pan lengthwise, then cut straight down the middle. Then I flip the pan back to horizontal and work along the top cutting into 8 slices (they’ll be about 1”- 1.5” wide), then repeat on the bottom. In my pan, full bars are 1-1.5” X 3.25” in size.


10. To wrap: I like waxed paper for this job (parchment would also work). I start by unrolling 8 sections of 6-8” of waxed paper. (I never measure when I do this—I just eyeball. As such, my sections aren’t uniform, but they’re approximate. I *did* go back afterward to confirm my approximations, though, so I could share them with you as a guideline.) I fold those in half longwise (waxed paper rolls tend to be about 12” wide—so you want this folded around the 6” mark), then cut. That leaves me 16 pieces of something in the 6x6 to 8x6 range.
Center the granola bar in the center on a diagonal.

Fold the bottom right corner up to cover the granola bar, with the bottom right corner reaching toward its top facing left corner.

Fold the top right corner across the granola bar toward the bottom left corner. The fold will happen along the base of the granola bar.

Fold the bottom left corner across the granola bar in the same manner, this time toward the now-folded corner. The fold will remain along the base of the granola bar.

Now roll upward, flipping the granola bar so it (and all the folds) faces the counter.

Then roll a second time so all the folds face you.

If you want, you can secure the flappy end with a piece of tape or sticker or even a rubber band, but I don’t usually bother.
For best results, store folded, wrapped bars in airtight containers. They’ll last at least 2 weeks this way, until you make your next batch.

A couple ending notes:
1. Lauren of Lauren’s Latest says the key to these bars is boiling the mixture enough but not too much. You want the boiled mixture to be just past the softball stage. I’ve included photos so you have a sense of what it looks like as it comes together, so hopefully that and the times I’ve included help you get it right. I’ve never had any trouble and that’s the method I’ve always used.
2. The Marshmallow Bits! What are they and where can you find those? They’re the tiny marshmallow bits you find in hot chocolate packets. They are like freeze-dried vanilla bits and they’re delightful. Typically, if your store carries them, they’re stocked by the hot chocolate. If you can’t find them there, the next most logical place to check is by the regular marshmallows. My actual supermarket doesn’t carry them at all. However, I get mine at Target. They’re available other places online, too.
 |
| This is what the package looks like. |
What’s your favorite kind of granola bar? Whatever it is, with this recipe, I’m fairly certain you can recreate them at home. Only better!
No comments:
Post a Comment
Please feel free to comment. However, please note that not all comments will be posted, and that it does take time to read through them, so your comments may not be read the day you write them.
Thanks to all for your thoughts.