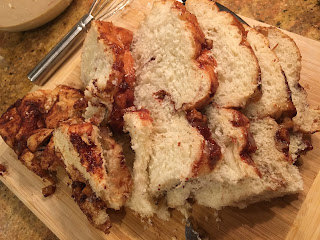
Remember the apple fritter bake that inspired me to make my own apple butter? (That’s kind of a rhetorical question because it was yesterday, after all.) Well, I made it.
It was all I hoped it would be.
And more.
It tasted like the love child of an amped-up cinnamon bun and gourmet French toast. It could be a decadent breakfast or brunch offering, or even a dessert. It can be served warm or cold (when it’s cold, the apple flavor really shines through.) The point is, I’m so glad I made it.
The inspiration for this recipe came from Wonky Wonderful’s blog. Her recipe was sponsored by Musselman’s, but mine is sponsored only by MY TASTEBUDS. I made a few tweaks to the original to suit my own preferences (for instance, I changed the bread, cut back the butter and sugar, subbed in light cream for heavy cream, halved the amount of glaze, and, of course, used homemade apple butter!), and that’s what I’ll indicate below. But I thank this blogger for a great idea. (And, I’ll state up front that even though I didn’t use the croissants per the original recipe, I can tell it would be even better with them and I sorta wanna host a brunch for my friends and make it with those just so I can taste it. Who wants to come?)
Let’s walk through this together now, shall we?
Apple Fritter Bake
For the apple layer
4-5 apples (about 5 cups)- peeled and chopped (I used Jonagolds again, because I have 10,345,603 of them)
3 Tablespoons butter
1/3 cup packed light brown sugar
1 teaspoon corn starch
2 Tablespoons warm water
For the bread layer
12-14 ounce loaf of Apple Fritter bread, sliced into at least 6 slices about ½ inch thick (I got mine at Wegmans. If you can’t find that, any thick, brioche style bread will do, preferably one with a cinnamon swirl and/or a sweet glaze. Raisin bread would probably also be delightful here.)
1/2 cup light cream
1/2 cup apple butter
3 eggs, lightly beaten
1/8 teaspoon ground cinnamon
For the glaze
1/4 cup powdered sugar
2 Tablespoons light cream
½ teaspoon vanilla extract
Directions:
1. Prepare the apples.
Melt butter in a large pan, over medium heat. Add brown sugar and stir.
Add chopped apples to pan and stir until all the apples are coated in the sugar-butter goodness. Cook for 5 minutes, stirring frequently.
In a small measuring cup, combine corn starch and warm water and stir until corn starch dissolves.
Add the corn starch slurry to the sugary apples and continue to cook for another 5 minutes. Remove from heat and set aside. The apples should be softish and the liquid syrupy.
2. Prepare the bread.
 |
| The loaf mostly whole |
 |
| Sliced up. See how it's mostly just unadorned bread inside? |
Whisk the light cream, apple butter, eggs, and cinnamon.
 |
| Before whisking |
 |
| After whisking |
Lightly grease 11x7 casserole dish. Place a single layer of bread slices on the bottom of the dish. (If your bread has an sugary exterior like mine, put that face up to avoid the risk of it burning on the bottom of your dish.)
Pour half of the apple butter/cream mixture over the croissants. (After I snapped this picture, I spread it out so it covered all the exposed parts of the bread. You should do the same.)
Top with half of the caramelized apple mixture.
Repeat the layering process with bread, cream, apples. Be sure to get every last drop of that syrupy goodness poured on there. Gently press down on the top with a wooden spoon or spatula to encourage the juices to soak into the breadstuffs.
Bake at 375° for 25 minutes, or until golden on top.
 |
| After baking |
3. During the last five minutes of cook time, prepare the icing.
Whisk powdered sugar, light cream, and vanilla together until smooth.
Store leftovers in the refrigerator (can be enjoyed right from the fridge or reheated in microwave.)
 |
| A small serving with the icing melting into it |
 |
| Layer shot |
If you’re asking yourself if I think it was worth it to make apple butter just so I could try this recipe, the answer is a resounding YES!
**I have no affiliation or relationship with any of the brands mentioned or linked in this post. All opinions and experiences expressed herein are my own.**


No comments:
Post a Comment
Please feel free to comment. However, please note that not all comments will be posted, and that it does take time to read through them, so your comments may not be read the day you write them.
Thanks to all for your thoughts.